Blog

Author: admin

What Are Inset Kitchen Cabinets?
Cabinet Mysteries

What Are Inset Kitchen Cabinets?

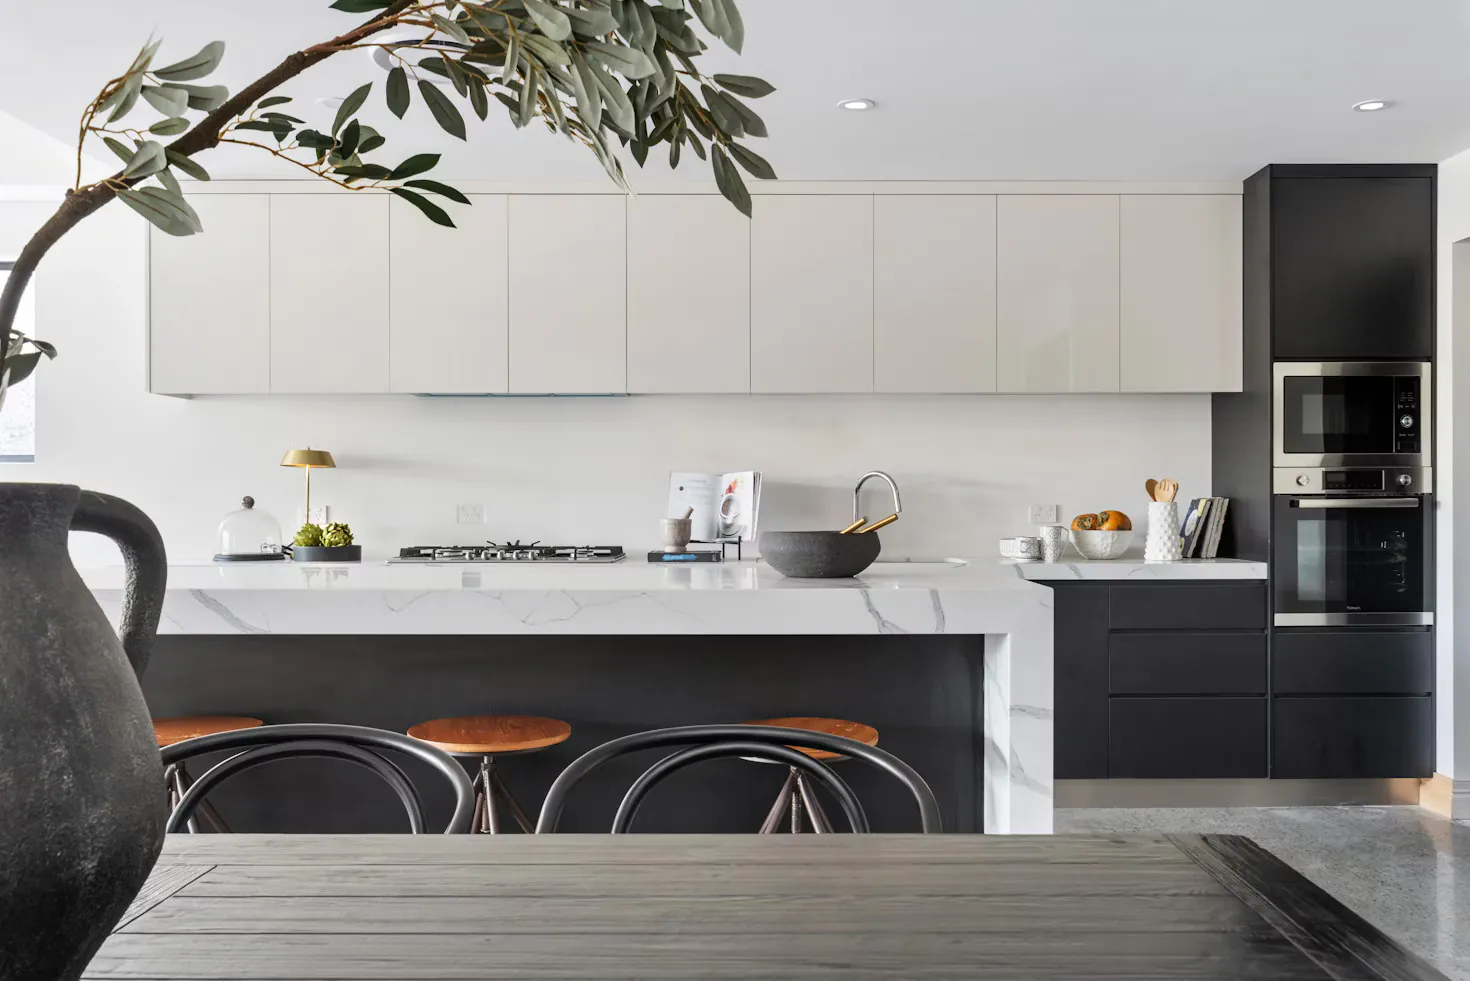
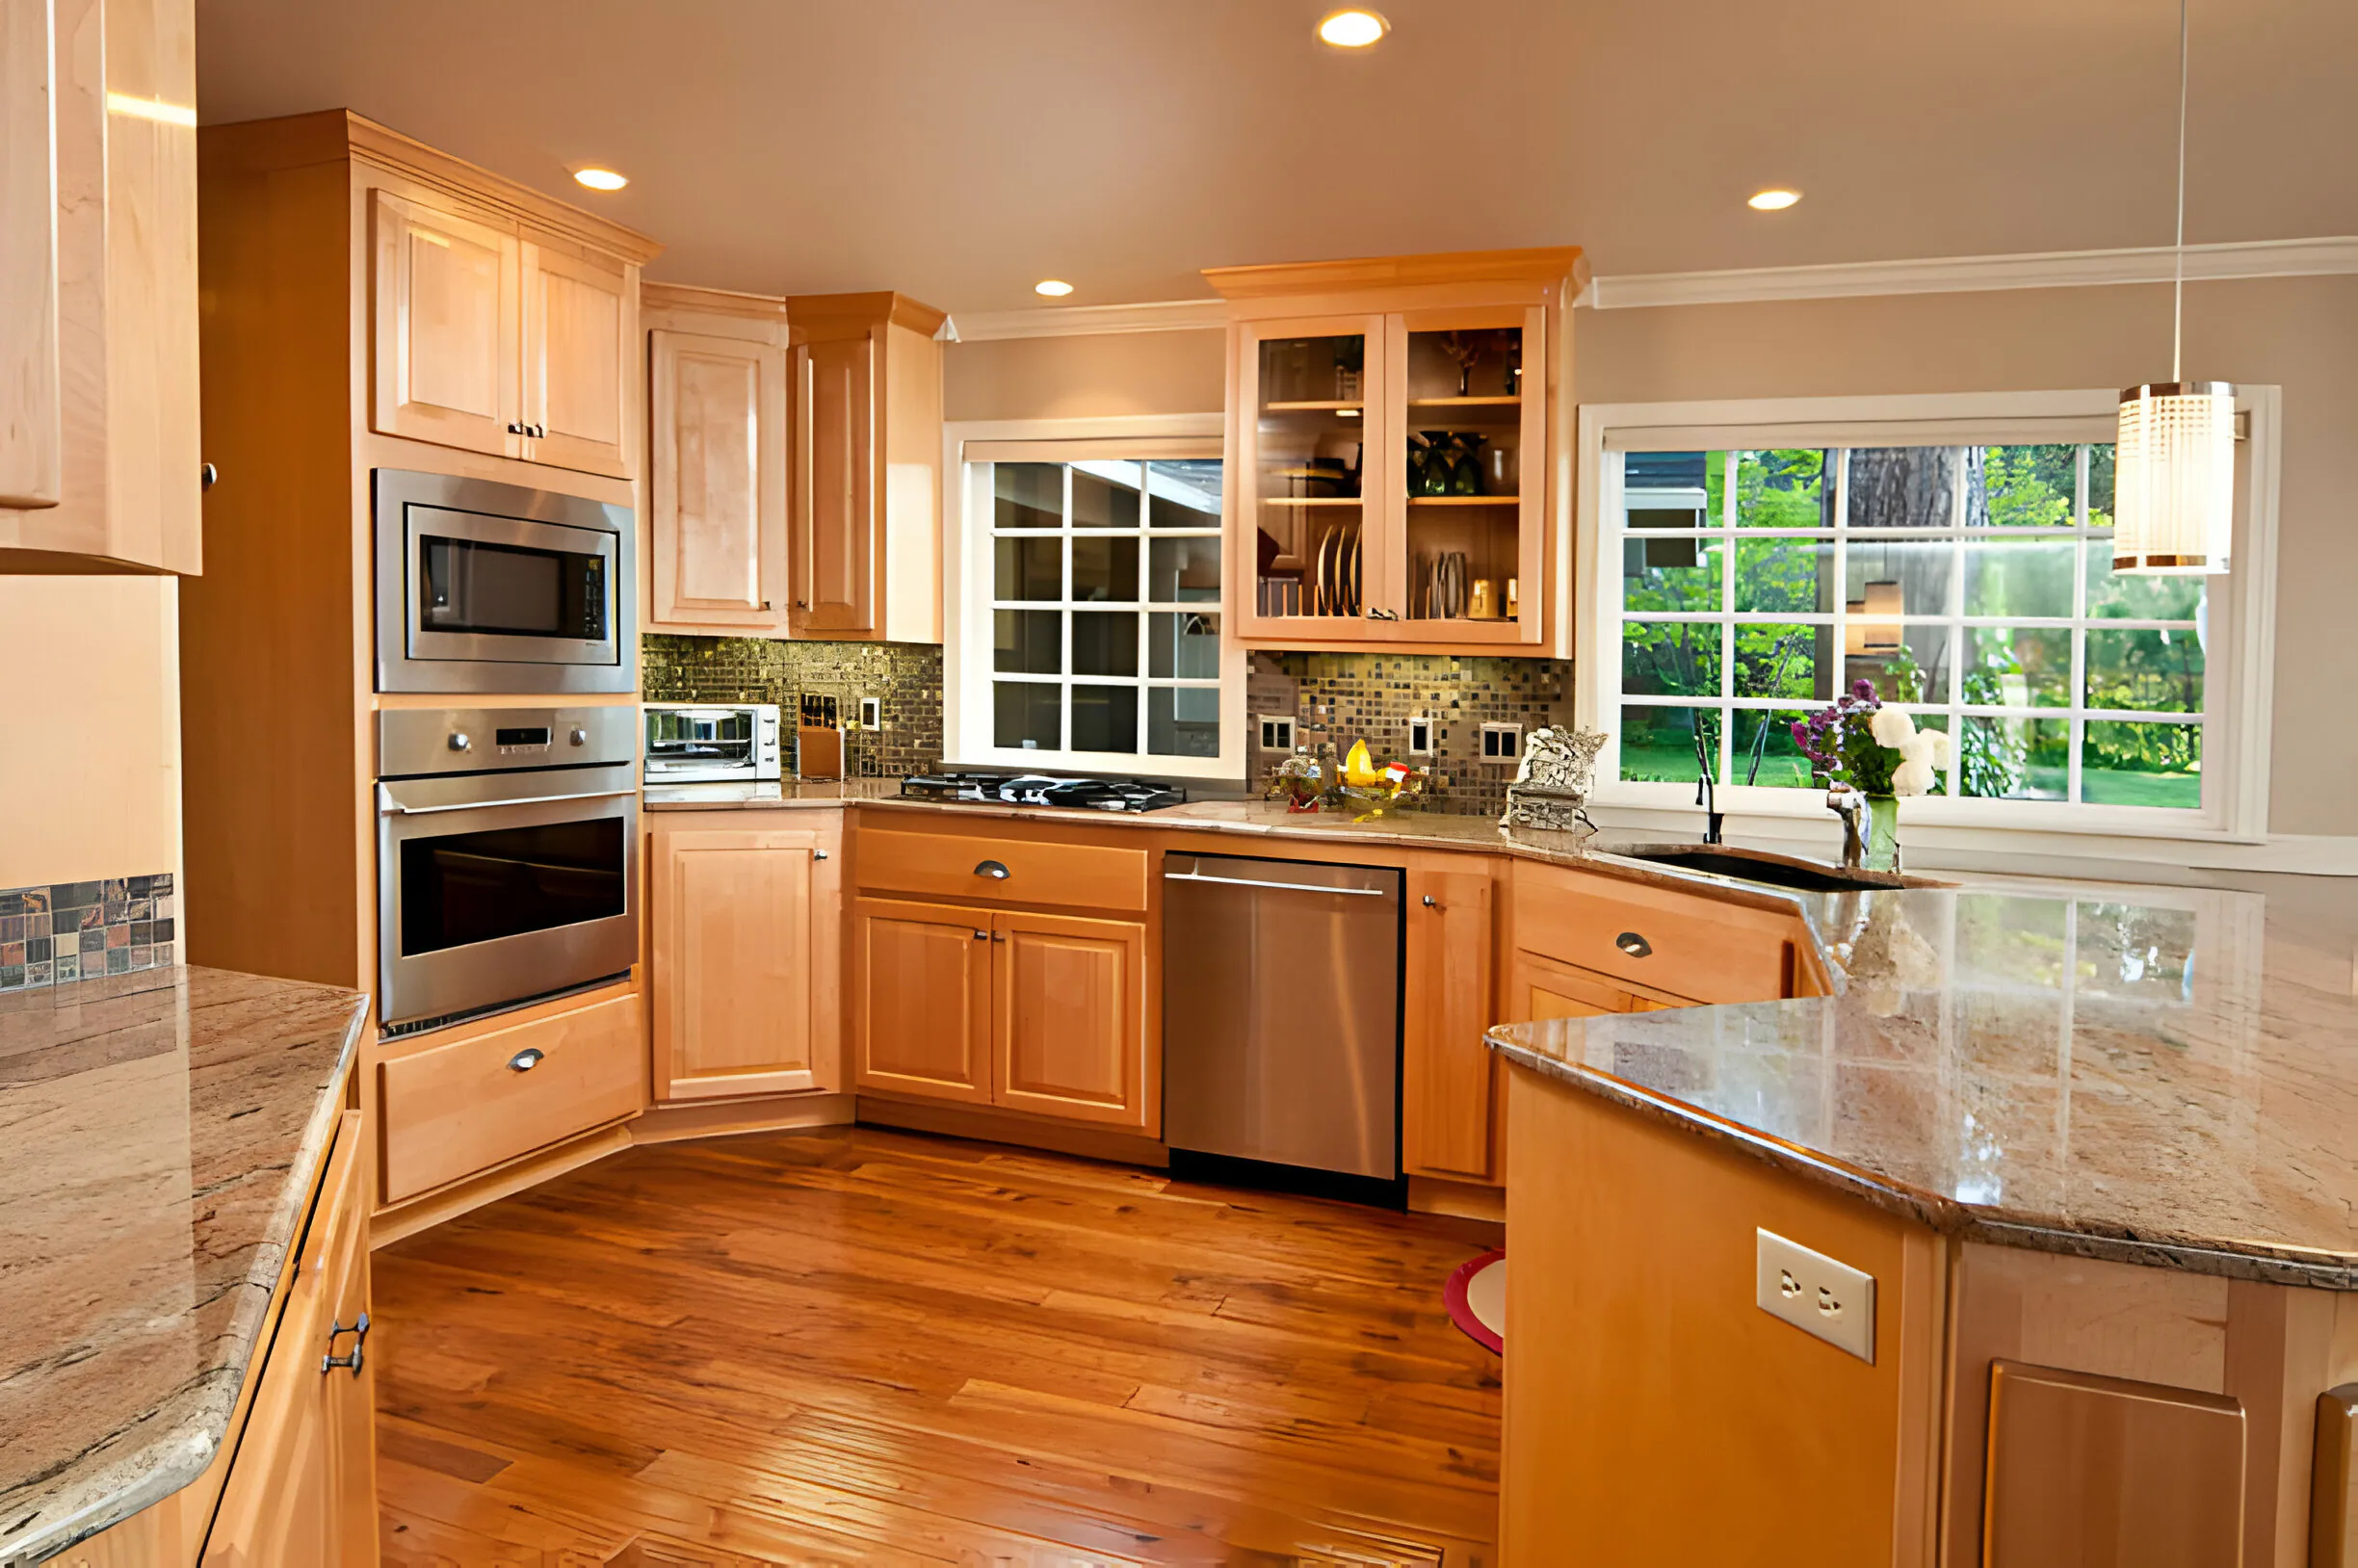
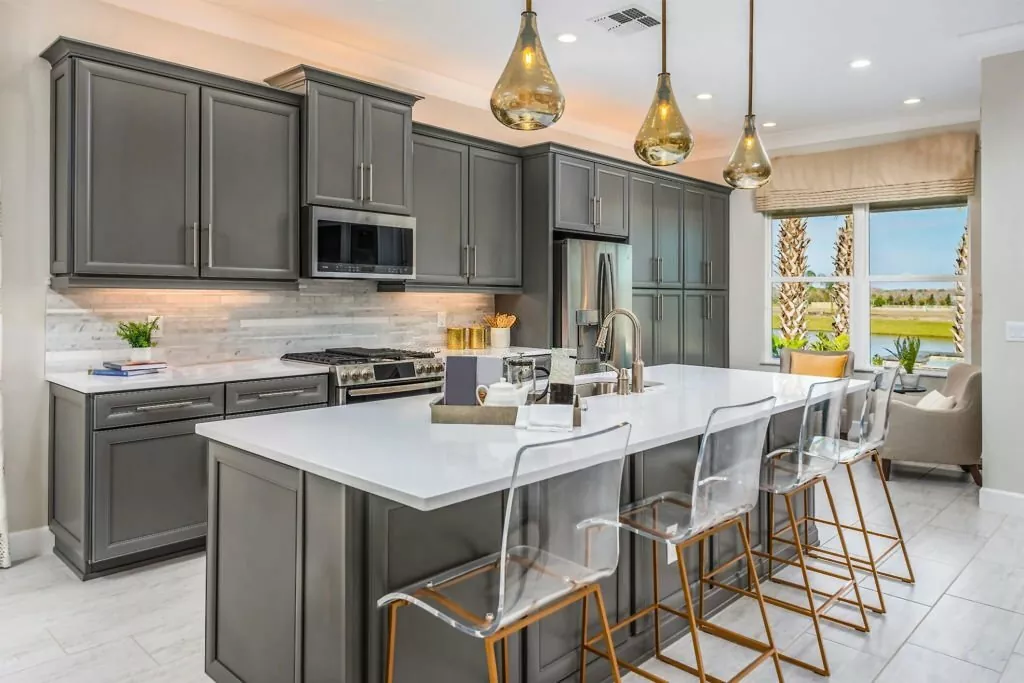
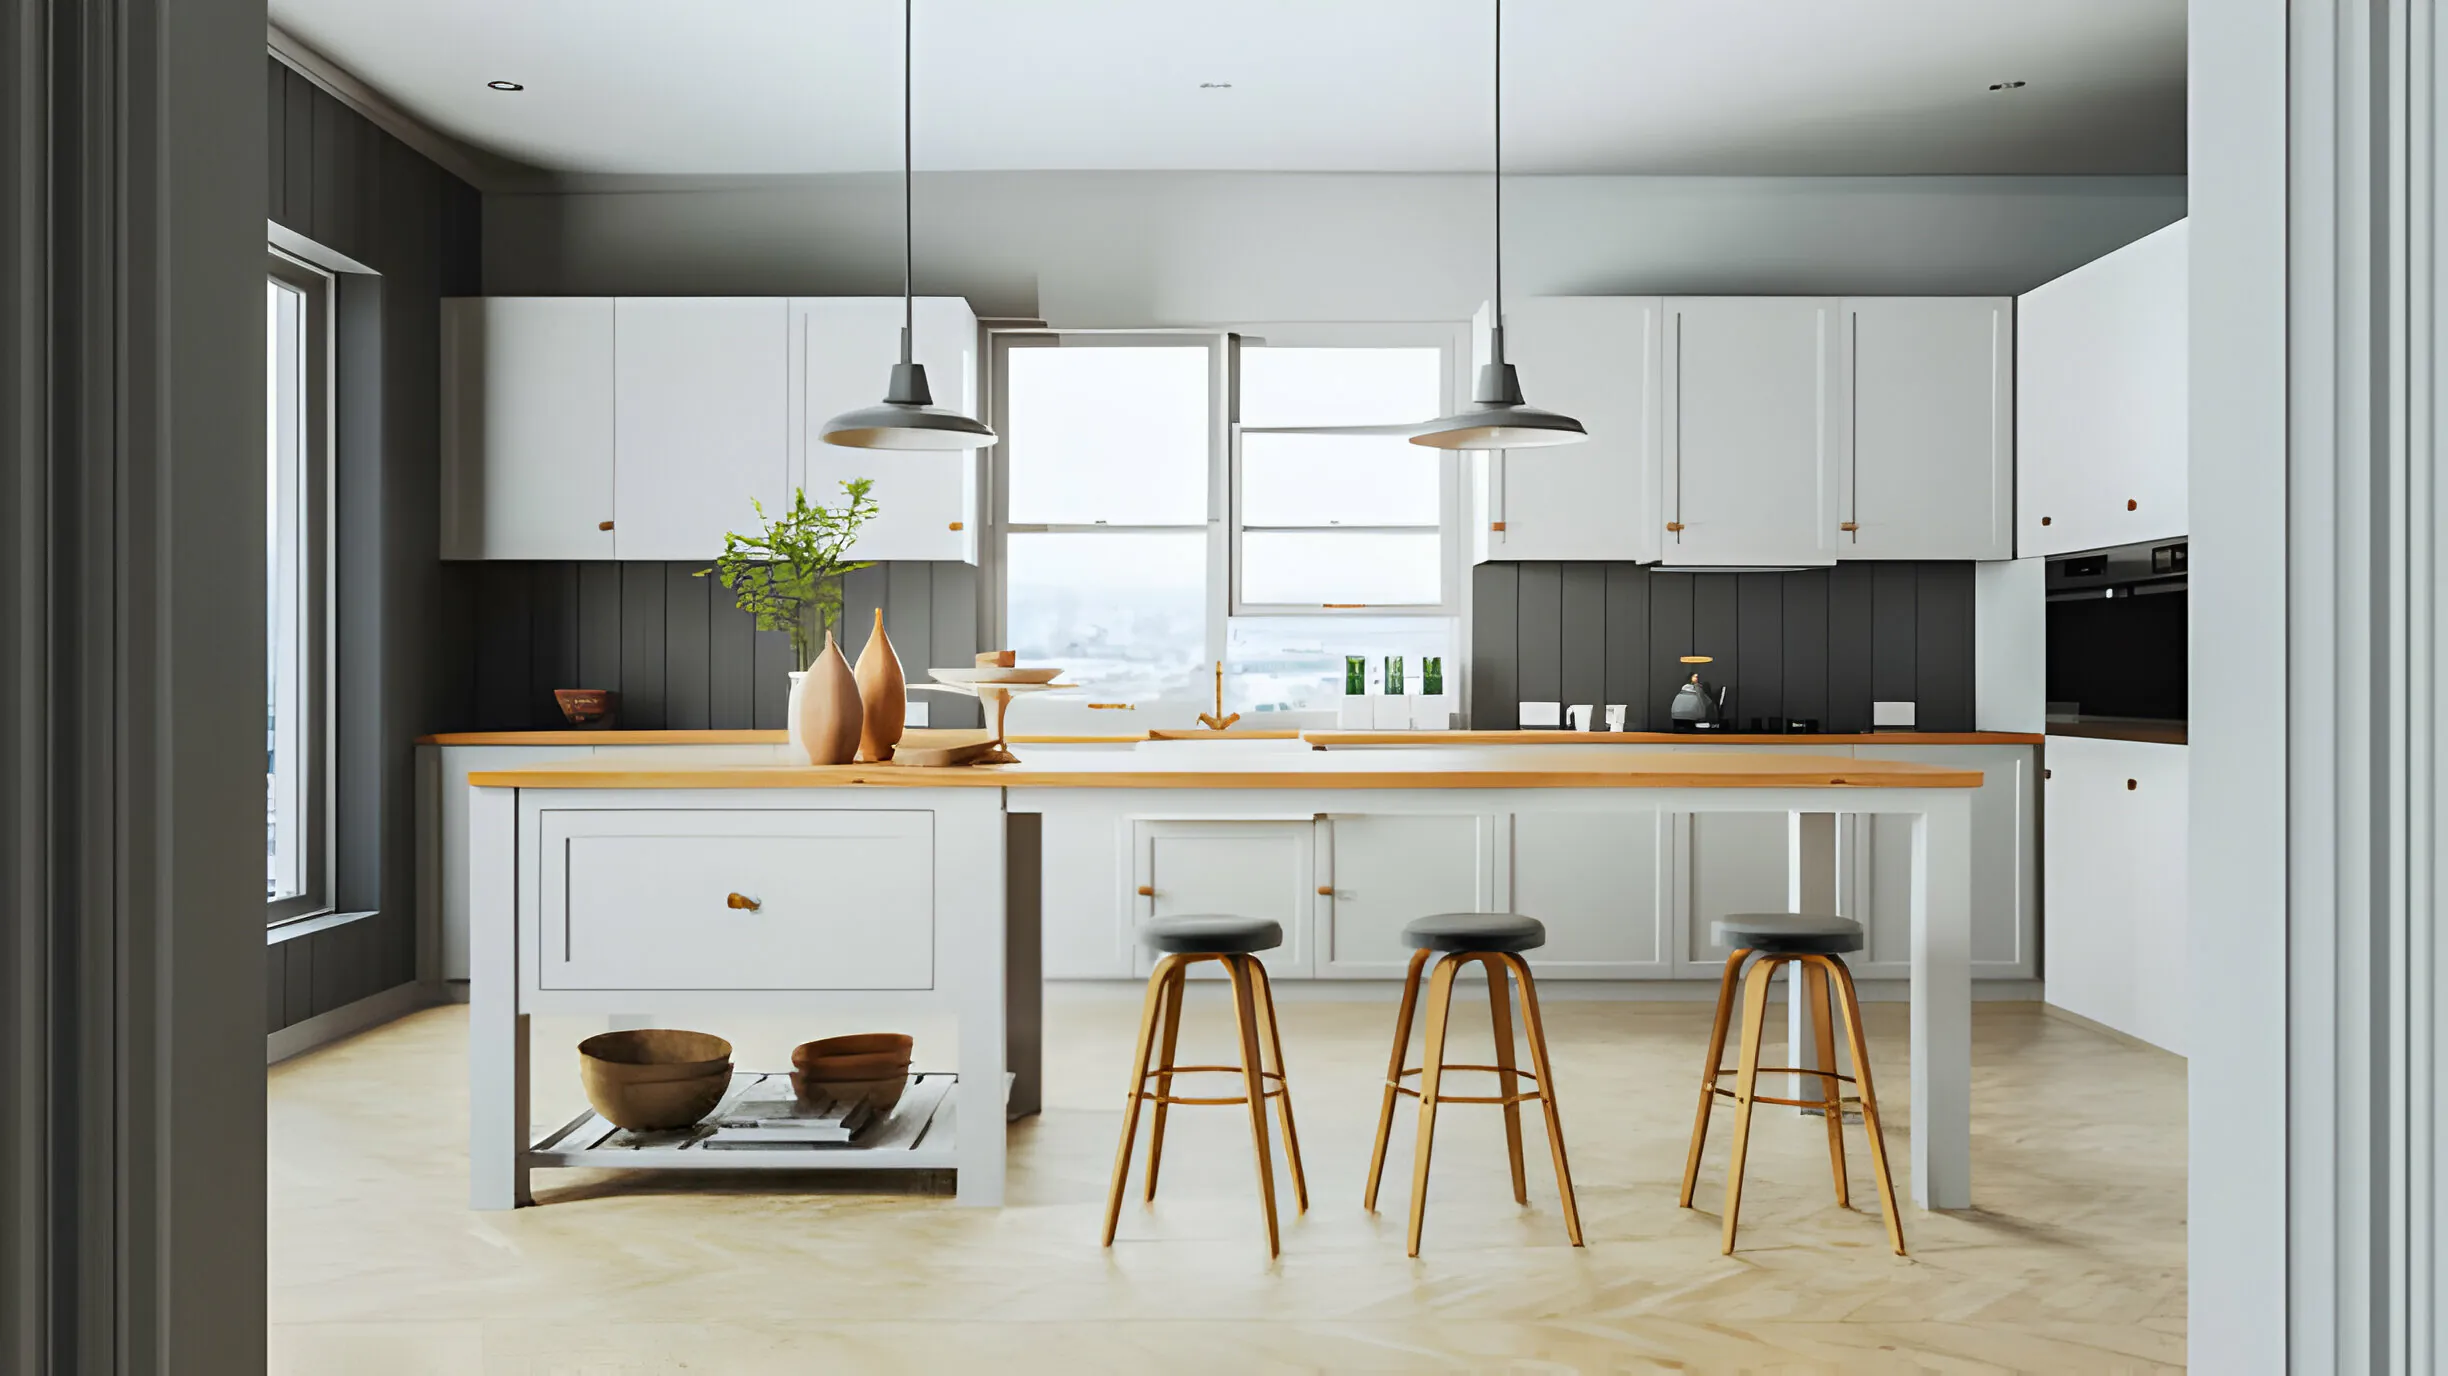
Remodelling a kitchen can be a daunting task, with a myriad of design choices to consider. These choices include the type of kitchen cabinets to install. Inset kitchen cabinets are a popular option. They offer a timeless and elegant look. In this article, we’ll dive into inset kitchen cabinets. We’ll explore what they are and their benefits and drawbacks. We’ll also cover why they’re a favored choice for many homeowners. What Are Inset Kitchen Cabinets? Inset kitchen cabinets have doors and drawers set flush with the cabinet frame. They don’t overlay it. This creates a sleek appearance. It has clean lines and few gaps between the doors and the frame.Also Read: How Much Weight Can Kitchen Cabinets Hold? Pros of Inset Kitchen Cabinets: Cons of Inset Kitchen Cabinets: Types of Inset Cabinet Doors: There are three standard styles of inset cabinet doors: Hinges and End Panels: There is a misconception that inset cabinets need exposed hinges. But, they can also use concealed hinges for a cleaner look. End panels for inset cabinets can have various styles. Furniture ends are the more upscale option.Also Read: Prevention and Repair Strategies for Enduring Cabinets Conclusion: Inset kitchen cabinets offer a timeless and elegant solution. They are for homeowners who want a sleek and sophisticated look for their kitchens. They come with a higher price and some drawbacks. But, their classic design and custom feel make them a popular choice. They are for those looking to elevate their kitchen space. You may be into modern minimalism or vintage charm. Inset cabinets can add character to your kitchen. They also add function and value to any home. Ready to elevate your kitchen with inset cabinets? Visit the Building Supply Depo today. You can see our range of top-quality inset kitchen cabinets. They will help you create a timeless, elegant space for your home! Frequently Asked Questions Are inset cabinets suitable for modern kitchens? Yes, inset cabinets have clean lines. They have a sleek look that fits modern kitchen designs well. Can I customize the hardware for inset cabinets? Absolutely! You can choose from a variety of door pulls or knobs to match your personal style and preferences. Are inset cabinets more prone to moisture damage? They may swell in humid places. But, proper care can prevent problems. Can I install inset cabinets myself? You can install it yourself. But, it’s better to hire a pro for precise fitting and alignment. Do inset cabinets require special cleaning? Not necessarily! You should clean them regularly. Use a mild detergent and soft cloth. That should suffice to maintain their appearance. Are inset cabinets more durable than overlay cabinets? Both types of cabinets are durable. Inset cabinets may have a slight edge because of their flush design. Can inset cabinets accommodate larger items? Yes, inset cabinets provide lots of space for storing large items like plates and bowls. They maximize storage capacity.

Do You Tip Floor Installers?
Floors

Do You Tip Floor Installers?

Regarding house renovations, one persistent query that frequently crosses homeowners’ minds is, “Do you tip floor installers?” Like the skillfully laid wood grains, the response is not always the same. We’ll explore the nuances of floor installation tipping etiquette in this extensive guide, including when, how much, and situations in which it might be regarded as a wood-grain token of appreciation. Understanding the Landscape of Tipping Floors It’s common for homeowners to find themselves torn between feeling grateful and unsure about how much to tip floor workers. The rules surrounding flooring can be less clear-cut than those governing tipping servers at restaurants. Together, let’s set out to discover the secrets of this uncharted territory.Also Read: How to Remove Stubborn Stains from Wood Floors? When Generosity Strikes: Scenarios That Warrant a Tip Wonderful Cleanup Operations: Imagine that your waterproof wood flooring has been expertly placed, and the floor experts have gone above and above by thoroughly cleaning the area. In these situations, a tip becomes an endorsement of their diligence. Exemplary Craftsmanship: You may be able to express your gratitude with a tip if your floor installers exhibit exceptional craftsmanship, transforming the installation of your engineered oak flooring into a piece of art.Also Read: How to Clean Unfinished Wood Floors The Weight of Heavy Furniture: Before starting the walnut laminate flooring installation, floor technicians occasionally have to make their way through a tangle of heavy furniture. It is polite to acknowledge their efforts in these situations. Hourly Workers: Tipping floor installers on an hourly basis is standard procedure when they work for a flooring firm. Giving them tips in appreciation for their time and work can improve workplace relationships. Installations that are difficult: If you have a complex project that requires a lot of sweat equity, like installing luxury laminate flooring, you should definitely leave a hefty tip (between $10 and $200).Also Read: Furniture When Getting New Flooring? When to Keep the Wallet Closed: Instances Where Tipping is Unnecessary Company Rules: Certain flooring retailers have clear guidelines prohibiting homeowners from leaving gratuities for floor installation. If there are any such rules, homeowners can easily follow them. Independent Contractors: When floor installers work as independent contractors or as proprietors of their own businesses, the initial payment typically covers their whole compensation. In some situations, tipping might not be necessary. Explicit Refusals: It is crucial to honor floor installers’ requests if they make it clear that tipping is not required or is against their policy. Bad Craftsmanship: On the other hand, it makes sense to hold off on leaving a tip if the installation of wood plank flooring is subpar, with unkempt building site and poor craftsmanship.Also Read: How to Clean Prefinished Hardwood Floors: The Culmination: To Tip or Not to Tip In the wide world of floor installation, homeowners still have a subjective say in how much to tip. Tipping is not customary, but those that do so show their appreciation for a job well done. Recall that gestures such as providing drinks, snacks, or a simple “thank you” can also have a positive impact on floor installers. It’s not only about the money. Conclusion The subtleties of the voyage will determine whether or not you tip your freshly laid floor as the last nail is inserted. You might choose to give a monetary expression of appreciation or a sincere “thank you.” When it comes to home improvement, make sure your choices are informed by the values of politeness and thankfulness. This will ensure that your floor installation experience is a beautiful blend of skill and admiration.  Join us at the Building Supply Depo for all your home improvement needs. Let’s make your floor installation experience one to remember – Visit us today! Frequently Asked Question Is tipping floor installers a norm in the UK? Can I offer refreshments instead of a tip? When is tipping not advisable? Should the tip vary based on the job’s complexity? What if the flooring company charges a high installation fee? Do installers usually clean up after the job? Are tips different for various flooring types? Can I tip even if the installer doesn’t expect it?

How to Clean Interior Doors?
Doors

How to Clean Interior Doors: A Handy Guide for a Sparkling Home

Cleaning your interior doors is essential. It maintains a fresh, inviting atmosphere in your home. You may have wooden, painted, or gloss doors. Keeping them clean improves their look and makes them last longer. This is a full guide. We’ll walk you through the step-by-step process. It covers cleaning many types of interior doors. This will ensure they stay pristine and gleaming. Why Clean Your Interior Doors Regularly? Interior doors play a vital role in enhancing the aesthetic appeal of your home. They not only provide privacy but also contribute to the overall ambiance of each room. However, over time, doors can gather dust, dirt, fingerprints, and other stains. These detract from their beauty. Regular cleaning helps maintain their looks. It stops grime from building up. This ensures they look new for years.Also Read: Are Black Interior Doors in Style? How Often Should You Clean Your Interior Doors? There’s no hard and fast rule for how often you should clean your interior doors. However, it’s recommended to clean them regularly to prevent the buildup of dirt and grime. Depending on the traffic in your home, you may choose to clean your doors every week, bi-weekly, or monthly. Also, clean door handles and knobs more often. Ideally, clean them every two weeks. This reduces the spread of bacteria. Cleaning Wooden Interior Doors Wooden interior doors add elegance to any room. But, they require special care to keep their beauty. Follow these steps to clean wooden doors effectively: Cleaning Painted Interior Doors Painted doors get fingerprints and stains. You must clean them often to keep them looking good. Here’s how to clean painted doors effectively: Cleaning Glossy Interior Doors Glossy interior doors add a modern touch to your home but can show dirt and fingerprints more easily. Follow these steps to clean glossy doors: Cleaning Interior Doors with Glass Panels Interior doors with glass panels require special care to ensure streak-free cleaning. Follow these tips for cleaning glass panels: Conclusion Regular cleaning is key to maintaining the beauty and longevity of your interior doors. By following the simple steps outlined in this guide, provided by Building Supply Depo, you can keep your doors pristine and gleaming for years to come. Remember to clean your doors often using gentle cleaners to avoid damaging the surface. With proper care, your interior doors will continue to enhance the feel of your home for years to come. Visit the Building Supply Depo for all your interior door maintenance needs. Explore our wide range of door collections and supplies tailored to keep your doors looking their best. Start your cleaning routine today and ensure your home always makes a lasting impression. Frequently Asked Questions (FAQs)  Why do my white doors turn yellow? Yellowing can result from too much moisture, tobacco smoke, or heat. It can also result from a lack of sunlight. How can I make my door white again? Create a paste with water and baking soda, apply to yellowed areas, leave for five minutes, then wipe and dry. For severe cases, consider repainting. How do I remove fingerprints from painted doors? Dilute mild washing up liquid in water. Use it to wipe away fingerprints and ensure a streak-free finish. What is a general cleaning routine for all door types? Dust the door, test cleaning solution on a hidden spot, apply with a spray bottle, wipe with a sponge, and dry with a cloth. How do I clean wooden doors? Mix mild dish soap with warm water, gently scrub the door with a soft sponge, and dry thoroughly. How do I care for painted doors? Use warm water and dish soap to remove stains. Test any cleaners on a hidden spot before using them on the whole door. How do I clean glass panel doors? Use a water and vinegar solution. Wipe with newspaper, and buff with a chamois. This will give you a sparkling finish.

Why Are Psychiatrists Called Shrinks?
Cabinet Mysteries

How Much Weight Can Kitchen Cabinets Hold? A Comprehensive Guide

Today’s modern kitchens blend functionality and style. Kitchen cabinets play a crucial role by storing items. They are expected to bear the weight of our kitchen essentials. This includes plates, utensils, pots, and pans. But have you ever wondered how much weight your kitchen cabinets can actually hold? Let’s dive into this topic. We will understand the load limit of kitchen cabinets and how to keep them strong. Understanding Weight Capacity Many factors determine the weight capacity of kitchen cabinets. The material, how cabinets are built, and their design all make cabinets sturdy. So does their installation. There is no set weight capacity standard due to these factors. But, industry standards suggest that a cabinet can support up to 500 pounds. However, it’s essential to note that this is a general estimate. Actual weight capacity may vary depending on many factors.Also Read: How to Paint Above Kitchen Cabinets? Factors Affecting Weight Capacity 1. Cabinet Material The material used in cabinets is key. It determines weight capacity. Solid wood cabinets are sturdier. They can support heavier loads than cabinets made from particleboard or plywood. Additionally, the thickness and quality of the material contribute to its strength.Also Read: Are Black Interior Doors in Style?  2. Construction and Design The way cabinets are constructed and designed also impacts their weight capacity. These cabinets have broad braces. They are made of plywood I-beams or plastic corner gussets. They are stronger and can hold more weight. Moreover, cabinets with adjustable shelves allow for customization and optimization of weight distribution. 3. Installation Proper installation is key. It ensures the stability and weight-bearing capacity of kitchen cabinets. Cabinets should be firmly attached to studs or joists. Use the right fasteners to stop them from failing under too much weight. Also, make sure cabinets are level and aligned during installation. This will help them support heavy loads.Also Read: How to Extend Kitchen Cabinets to Ceiling 4. Weight Distribution Even weight distribution is essential for maximizing the weight capacity of kitchen cabinets. Put heavy items on lower shelves. Use the bottom of cabinets for storing bulky items. This evens out weight. Avoiding overloading individual shelves and cabinets helps prevent strain on the cabinet structure. 5. Cabinet Support Systems Certain features and support systems can enhance a cabinet’s weight capacity. Cabinets have reinforced backs, strong shelves, and solid hardware. They are better equipped to handle heavy loads. Also, adding support brackets or bars can add strength and stability to cabinets. This is especially true for cabinets carrying a lot of weight. Tips for Maximizing Weight Capacity 1. Evenly Distribute Weight To prevent overloading and ensure your kitchen cabinets last, spread weight evenly. Avoid putting heavy items on one side of the cabinet. This can strain the cabinet and hurt its stability. 2. Utilize Pantries Pantry shelves can hold more weight than kitchen cabinets. They are great for storing heavy items like pots and pans. Reserve kitchen cabinets for lighter items like spices and canned goods. Using pantries for heavy items helps reduce strain on kitchen cabinets. It also keeps them from getting too heavy. 3. Choose Quality Cabinets When selecting kitchen cabinets, choose high-quality materials and construction methods. They should prioritize durability and strength. Solid wood cabinets are sturdy. They can support heavier loads than cabinets made from particleboard or plywood. Custom cabinets often exceed industry standards. They can hold more weight. This makes them a good investment for homeowners who want durability. Consider features such as reinforced backs. They have sturdy shelves and solid hardware. These features enhance a cabinet’s ability to withstand heavy loads. 4. Consider Adjustable Shelving Cabinets with adjustable shelving provide flexibility in organizing and distributing weight. By customizing shelf heights for item size and weight, homeowners can spread the weight better. This will prevent overloading. Additionally, adjustable shelving allows for easy reconfiguration as storage needs change over time. 5. Reinforce Cabinet Support Enhance the weight capacity of your kitchen cabinets by reinforcing their support systems. Add support brackets, reinforcement bars, or extra fasteners. They will strengthen cabinet structures, especially in heavy load-bearing areas. Attaching cabinets to studs or joists with appropriate fasteners ensures they are secure. This also adds to their strength and weight-bearing ability. Conclusion Understanding the weight limits of your kitchen cabinets involves considering various factors. Industry standards provide a general guideline. But, the specifics depend on your cabinets’ materials, construction, and design. Focus on things like furniture braces, plywood I-beams, and plastic corner gussets. This way, you can make good choices. You will use them when picking or checking the sturdiness of your kitchen cabinets. Remember, well-kept cabinets with proper support can greatly extend your kitchen cabinets’ life. It will keep them reliable and functional for years. Explore our selection at the Building Supply Depo. We have high-quality kitchen cabinet materials and accessories. They are durable and reliable for your needs. Frequently Asked Questions (FAQs)  What are the standard dimensions for kitchen cabinets? Standard kitchen cabinets are typically 24 inches deep and 36 inches tall. They are 12 to 48 inches wide. What materials are commonly used in kitchen cabinet construction? Common materials include oak and maple. Also, there are engineered woods, like plywood and medium-density fiberboard (MDF). How do I determine the weight limit of my kitchen cabinets? Weight limits depend on factors like materials and construction. Consider features like braces and gussets. Consult the manufacturer’s guidelines for weight limits. Can I install additional support for my kitchen cabinets? Yes, you can strengthen cabinets. You can add braces or supports. You can also upgrade hardware. This will increase weight capacity and stability. How often should I maintain my kitchen cabinets? You should do regular maintenance. This includes cleaning and checking for loose hardware. You should do it at least once a year to ensure longevity. What’s the lifespan of kitchen cabinets? With proper care and maintenance, quality kitchen cabinets can last up to 50 years or more. Are there alternatives to traditional wood cabinets? Yes, other options include metal cabinets,

How to Paint Above Kitchen Cabinets?
Cabinet Mysteries

How to Paint Above Kitchen Cabinets? A Step-by-Step Guide for a Fresh Look

Painting above kitchen cabinets can be simple and effective. It can refresh your kitchen without breaking the bank. You may be aiming to add colour or just touch up the paint. This guide will walk you through the process to get a pro finish. From preparation to final touch-ups, we’ve got you covered. Preparing the Area Before diving into painting, it’s essential to prepare the area properly. Start by removing items from the top of your cabinets. Then, cover countertops and appliances with drop cloths or plastic sheets. This will protect them from paint spills. Ensure proper ventilation by opening windows or using a fan for air circulation. Tools and Materials Needed Before starting the painting project, make sure you have everything you need. Gather these tools and materials: Safety Measures Safety should always come first when painting. Make sure to use a sturdy ladder or step stool placed on a flat surface to avoid accidents. Wear gloves and goggles. They protect you from paint splatters and fumes. Keep children and pets away from the area while working with paint chemicals.Also Read: Enhance Your Kitchen: What Colour Wood Floor Goes With Dark Cabinets? Managing Space Constraints If you’re in tight spaces or under low ceilings, consider using a step ladder or stool. They will help you access hard-to-reach areas. An extension pole can also be handy for reaching high corners without climbing too high. Removing cabinet doors first gives more space and flexibility. It makes it easier to paint above them. Cleaning the Surfaces Cleanliness is key to achieving a smooth finish. Use a degreaser or all-purpose cleaner to remove any dirt from the surface. It is above your cabinets. Wipe down the area with a damp cloth and then apply your cleaning solution using another clean cloth. Rinse with water. Let it dry completely before priming or painting. Also Read: Prevention and Repair Strategies for Enduring Cabinets Priming the Cabinets Priming helps the paint adhere better and provides a smooth surface for an even finish. Choose a primer for your cabinet’s material. It could be wood or laminate. Apply primer with a brush on difficult-to-reach areas and use a roller for larger surfaces. Let the first coat of primer dry completely. Then, apply another coat if needed. Choosing the Right Paint Selecting the right paint is crucial for a long-lasting and durable finish.  Applying the Paint When applying paint, use long, even strokes in one direction for a smooth finish. Start at the top of your cabinets and work your way down towards the bottom. Be careful not to overload your brush or roller with too much paint to avoid drips and uneven coverage. Allow ample drying time between coats before proceeding. Final Touch-ups Once the paint has dried, check the surfaces. Look for any spots or uneven areas. Use a small brush to fill gaps and imperfections. Sand lightly between coats for a smoother finish. Allow enough time for the paint to dry. Then, remove the tape and plastic from nearby areas. Clean Up and Maintenance After painting, remove the tape and clothes carefully. This will avoid damage and mess. Dispose of used paint cans, brushes, and rollers according to local regulations. Also dispose of other materials in the same way. Regular maintenance is key. It keeps your newly painted space looking fresh for years to come. Conclusion Painting above kitchen cabinets can be a rewarding DIY project. It adds depth and character to your space. By following these steps and taking care, you can achieve a pro finish. It will bring new life to your kitchen. So grab your paintbrushes and get ready to transform your space with a fresh coat of paint! Ready to start your kitchen transformation? Visit Building Supply Depo for a wide range of high-quality paints, brushes, and all your DIY project needs. Let’s build your dream space together! Frequently Asked Questions (FAQs)  How can you shield kitchen cabinets when painting the ceiling? To protect kitchen cabinets while painting, use drop cloths and painter’s tape. How do you bridge gaps between cabinets and ceilings? Attach trim atop upper cabinets. This will fill the gaps between them and the ceiling. It will make the cabinets integrate seamlessly and reduce dust buildup. Is it common to embellish above kitchen cabinets? Adorning above kitchen cabinets is a great way to show off cherished items. It also keeps essentials accessible. This is true in both spacious and compact areas. Which paint type is most suitable for the space above kitchen cabinets? Choose semi-gloss or satin paint. They are durable and have a smooth finish. Use them for the area above kitchen cabinets. What measures should be taken to safeguard cabinet surfaces during painting? Prevent accidental paint spills. Do this by shielding cabinet surfaces with plastic sheets or painter’s tape. Also Read: How to Extend Kitchen Cabinets to Ceiling

interior doors
Black Interior Doors

Are Black Interior Doors in Style? Unveiling the Timeless Elegance

In the ever-evolving world of interior design, trends come and go, but some elements stand the test of time. Black interior doors are a staple in modern design. Here’s why they still make a bold statement in homes. The Allure of Black Interior Doors Black, often hailed as the new neutral, brings a touch of sophistication and drama to any space. It’s not just a fad. Black interior doors are a timeless choice, not a passing trend. Let’s delve into the reasons why these doors remain in vogue. 1. Instant Drama in Every Space Picture a room with white doors – clean and expected. Now, envision that same space with black interior doors. The visual excitement and drama that black doors bring are unparalleled. In a world of the ordinary, a black door stands bold and classy, adding an instant touch of glamour to your home. 2. Elevating the Mundane: Builder-Grade Doors Unleashed Transforming the ordinary into the extraordinary is where black interior doors shine. A can of black paint is a quick fix. It adds instant luxury to plain, builder-grade doors. The black is neutral and lacks undertones. It has a sheen that catches the eye. It makes your doors look expensive without breaking the bank. 3. Balancing Act with Black Decor Black doors are key. They create balance in a room with other black elements. It could be a chest of drawers or subtle tones in bathroom tiles. Black interior doors anchor the space. They let other features pop. The usefulness of black doors is clear. They work seamlessly with any interior style, from rustic to contemporary. 4. Practicality in Concealing Dirt For families with children, the struggle against dirty handprints is real. Black interior doors come to the rescue by concealing dirt effectively. These doors are a practical choice for high-traffic areas. They keep their elegance while offering an easy way to deal with the challenges of keeping a clean home. 5. Illusion of Height: Making Ceilings Appear Taller Black interior doors use a clever design trick. They draw the eye upward, making the ceilings seem taller. This feature adds beauty. It also makes a room feel bigger. Solid black doors become a focal point, seamlessly integrating into various design styles. The Best Black Colour and Paint Finish If you’re considering joining the black door trend, Black is a favorite. It’s chosen for its neutrality and versatility. When it comes to paint finish, options like semi-gloss and satin are durable and shiny. They strike a balance between these traits to ensure a lasting and attractive look. Maintaining the Elegance: Cleaning Black Interior Doors Black interior doors are beautiful. They are also practical. Cleaning them is easy. Dust regularly with a microfiber cloth. For tougher dirt, use a mild dish soap and water. They are resilient to stains. They are also easy to clean. This makes them a low-maintenance yet high-impact choice. Choosing the Right Trim Colour When it comes to trim colour, coordination is key. White, cream, and grey are timeless choices. They go well with the boldness of black doors. For a seamless look, consider painting the door’s trim black. This will create a stylish and cohesive appearance. Conclusion: Embracing Timeless Elegance in Your Home Black interior doors are more than just a trend. They are a design choice that mixes style with usefulness. They add drama and conceal dirt. These doors keep getting better. They show the enduring allure of timeless elegance in interior design. As you start your home improvement journey, think about the lasting charm of black doors. They reflect modern tastes and will have a lasting impact on your living spaces. Make your home stylish with bold black. It makes a statement that goes beyond trends.  Frequently Asked Questions (FAQs)  Are black doors outdated? No, black doors are timeless. They are seen as the new neutral. They add sophistication to any space. Do black doors show fingerprints easily? Yes, fingerprints may show, especially in high-traffic areas. But, regular cleaning can keep them elegant. Can black doors make a room look smaller? No, black doors do this. They draw the eye upward. This creates the illusion of taller ceilings and enhances spaciousness. Are black doors suitable for dark rooms? Black doors work best in bright rooms with light walls. They create a bold contrast and avoid a cramped feeling. Do black doors go well with any interior style? Yes, black doors are versatile. They complement many styles, from rustic to modern. They fit well into diverse design aesthetics. Are black doors hard to maintain? No, black doors are easy to maintain. Dust them regularly with a microfiber cloth. Use mild dish soap for tougher dirt. This upkeep keeps them looking elegant and pristine. Can I paint my existing doors black? Painting existing doors black is a cheap way to transform and modernize them. It also adds a touch of instant luxury. Do black doors make a room too dark? No. When placed in light-filled rooms, black doors can enhance the atmosphere. They create a chic and sophisticated feel. For more information Click here.

Extend Kitchen Cabinets to Ceiling
Cabinet Lighting Wires

How to Extend Kitchen Cabinets to Ceiling

Ever peeped into your kitchen and thought, Blimey, what a waste of space up top!? You’re not alone! Many homes have cabinets that don’t quite reach the ceiling, leaving a gap that collects dust and looks a bit naff. Fear not! Extending your kitchen cabinets to the ceiling is not as daunting as it might seem. In this guide, we’ll walk you through the process, step by step, to achieve a sleek, custom look without breaking the bank. Why Bother Extending Cabinets? First off, extending your cabinets to the ceiling maximises storage space – a godsend for those of us with kitchen gadgets galore. It also adds a touch of elegance to your kitchen, creating a seamless look that’s right posh. Plus, it deters dust and grease from gathering atop your cabinets. Win-win! Getting Started Before we dive in, you’ll need a few bits and bobs: a tape measure, saw, plywood or MDF, wood glue, nails or screws, paint, and, optionally, doors for your new cabinet space. Donning safety gear is a must – we’re talking goggles and gloves, folks. Measure Twice, Cut Once Kick things off by measuring the gap between the top of your cabinets and the ceiling. Be thorough! If your cabinets have a bit of a curve or end before reaching a wall, take note of these quirks as they’ll affect the size of the panels or cubbies you’re adding. Covering the Gap Plywood Panel Method One straightforward approach is to fit a piece of plywood into the space. You’ll want to cut your plywood to size, then install blocks along the ceiling and top of the cabinets. These blocks will serve as anchors for your plywood. Once in place, secure the panel with nails or screws. For a polished look, finish it off with some moulding along the top and where the panel meets the cabinets. Adding Cubbies If you fancy keeping the storage space accessible, consider building cubbies. Cut plywood to form the top and bottom of each cubby, then create dividers based on how large you want each section to be. Glue these bits together, and once dry, hoist your new cubby atop your existing cabinets. Secure it in place, and don’t forget to add moulding for that built-in look. Optional: Installing Doors For those who want to keep things tidy or hidden away, adding doors to your cubbies is a brilliant idea. Measure each cubby opening, add a smidge for overlap, and cut plywood or buy pre-made doors to fit. Attach hinges and knobs, then mount them to your cubbies. A lick of paint and you’ve got yourself some swanky new cabinet space that reaches all the way to the ceiling. Finishing Touches Whether you’ve gone for the simple panel or the cubby route, painting your new additions to match your existing cabinets is crucial. It ties the whole look together, making your extension appear seamless and intentional. If you’re feeling adventurous, contrasting colours can add a splash of character, just make sure they complement each other well. Materials You’ll Need A Few Tips from the Trenches Conclusion Extending your kitchen cabinets to the ceiling is a doddle with a bit of planning and elbow grease. Not only does it elevate the look of your kitchen, but it also provides extra storage space and keeps your kitchen cleaner. Whether you choose to add a simple panel or build new cubbies, the result is a more polished and functional kitchen space. So, roll up your sleeves and give it a go – your kitchen will thank you for it! FAQsQ: Can I do this project on my own? A: Absolutely! With basic tools and a careful approach, it’s a manageable DIY project. However, having a mate to help with the heavy lifting and installation can make the process smoother. Q: How long does this project take? A: Depending on the size of your kitchen and the complexity of the extension, it can take a weekend or a couple of weekends to complete. Q: Will extending my cabinets to the ceiling add value to my home? A: Yes, it can. By improving the functionality and appearance of your kitchen, you’re likely to see a positive impact on your home’s overall value. Q:Can I extend my cabinets if I have a soffit?  A:Yes, but you’ll need to remove the soffit first. This might require additional work if it houses electrical wiring or plumbing. Q:Do I need professional tools?  A:Basic tools will suffice for most of the work, but having a power drill and saw can make the job easier. Q:Is this project suitable for beginners?  A:Absolutely! With careful planning and patience, anyone can extend their kitchen cabinets.

how to clean prefinished hardwood floors
Cabinet Mysteries

A Complete Guide to Maintenance and Flooring Mastery

Prefinished hardwood floors are a common option among homeowners because of theireasy installation, durability, and attractive appearance.Discover the best ways to clean prefinished hardwood floors and keep them clear and shiny. Let us guide you through essential cleaning and maintenance tips to preserve the beauty and longevity of your prefinished hardwood floors. What is Prefinished Hardwood? First and foremost, it’s important to know about prefinished hardwood. Prefinished hardwood floors have a protective layer added at the factory, which helps prevent damage from things like wear, scratches, and stains. Because of this pre-applied layer there’s no need to do additional work on the floors on-site, making the installation process fast and more convenient. Moreover, prefinished hardwood offers a wide range of finish options, from glossy to matte, allowing you to choose the aesthetic that best suits your space. With this flooring option, you not only save time on installation but also enjoy the flexibility to customize the look of your floors to complement your unique style and preferences. Essential Maintenance Tips for Prefinished Hardwood Floors: Preserving the beauty and longevity of prefinished hardwood floors requires strict observationof general maintenance guidelines. Here’s an overview of these important indications. Top of Form Sweeping and dusting are basic practicesfor preventing scratches and maintaining the floor’s shine. Dust and debris, if left unattended, can act like rough particles, causing wear over time. Use a soft-bristle broom or a microfiber dust mop. The soft bristles effectively capture dust without scratching the surface, and the microfiber is gentle on the finish. It’s important to avoid excess water to protect your prefinished hardwood floors.Although prefinished hardwood offers more water resistance than unfinished wood, too much moisture can still cause harm, leading to potential swelling or warping. Act promptly by wiping spills with a dry or slightly wet cloth, ensuring no excess water is left behind. When cleaning, be mindful to avoid using too much water and never leave wet clothes or towels on the floor, as this can compromise the floor’s integrity over time. By adopting these simple practices, you safeguard your floors from the potential risks associated with excess water exposure. Picking the proper cleaning solution is essential for keeping your prefinished hardwood floors in good condition. Harsh chemicals or acidic cleaners can hurt the protective layer, so it’s best to be careful. Choose a cleaner made for hardwood floors that says “pH-neutral” or “hardwood floor cleaner” on it. Follow the instructions on the bottle for how much to use and how to apply it. Before using it on the whole floor, do a small test in a hidden spot to ensure it’s okay. These simple steps help keep your floors clean and safe. Using the right toolsto clean your prefinished hardwood floors effectively without causing any damage is very important. Choose a microfiber mop because it is gentle and prevents streaking. Dampen the microfiber mop with the cleaning solution and mop the floor following the direction of the wood grain. This technique not only ensures a thorough surface cleaning but also minimizes the chances of leaving behind streaks, keeping your floors pristine. It’s crucial to treat stains quickly and carefully if you want to keep prefinished hardwood floors looking perfect. If stains are not removed right away, they can harm the appearance. Using a soft cloth and the suggested cleaner, gently work the stain in circular motions to remove spots. Removing the stain without damaging the finish ensures that your prefinished hardwood floors will continue to look amazing for a long time. Secrets For Perfect Prefinished Hardwood Floors : The secret to keeping prefinished hardwood floors flawless is to use surface protection techniques and routine cleaning. Furniture legs can be protected from dents and scratches by: Prefinished Hardwood Care and Top-notch Flooring Selections at Building Supply Depot: Mastering the art of cleaning prefinished hardwood floors is crucial, and choosing the right source for your flooring materials plays a significant role. Opting for a reliable shop can enhance your experience in maintaining and caring for your prefinished hardwood floors. For top-quality hardwood, consider Building Supply Depo as your go-to online store. They provide a vast selection of high-quality flooring options and valuable guidance on the best products tailored to your needs. Additionally, they provide competitive prices, making it a cost-effective and convenient choice for homeowners looking to invest in durable and aesthetically pleasing flooring. Transform your cleaning routine and preserve the timeless beauty of your floors. Start now for a home that gleams with natural elegance!

Prevention and Repair Strategies for Enduring Cabinets in Delaware
Enduring Cabinets

Warped Cabinet Doors: Prevention and Repair Strategies for Enduring Cabinets:

A warped cabinet door is one of those things that a family wouldn’t like to see in their house. Whether due to humidity, moisture, or temperature changes, a warped door affects not only the visuals but also the functionality of your cabinets. This comprehensive guide will discuss how to fix this problem through practical steps to repair your cabinets. What Causes Cabinet Doors to Warp: In woodworking, warping directs to the bending or twisting out of shape of flat or straight forms, which is the natural state of wooden cabinets and other wood stuff. A warped cabinet door, on the other hand, could refer to a minor twist in the door generated by defective hinges. When the cabinet door is shut, the door frame cannot meet the top and bottom face frames and rests flat, forming a hole that lets air rush into the cabinet, bringing in dirt and dust. However, to understand how to repair a warped cabinet door, we must first understand some of the causes of warped cabinet doors. Also read : The Beauty Of Extending Cabinets For a Spacious Kitchen Reasons for Wooden Cabinet Doors Warping: Solid Panel Warping Challenges: · Excessive Moisture Excessive moisture is a primary adversary to wood, particularly in humidity. Warping occurs when the moisture range of wood overextends the moisture content (MC) of the air around it. The door’s sensitive wooden material catches moisture like a sponge, causing the wood fibers to swell, expand, and twist. In the kitchen, if cabinet doors are close to a sink, water can splash back onto the door. · Extreme Heat Too much heat inside the house might cause cabinet doors to expand due to a moisture imbalance between the inside and exterior. Furthermore, sudden fluctuations in temperature can cause extreme expansion of cabinet doors and even wood breaking or splitting. Structural Issues: · Screws that have been rusted Screws carry the door together, and if they get stripped, damaged, or ruined, the door may begin to catch on the jambs as it is unlocked and closed. In this scenario, it is advised that the stripped screws be removed and replaced with new ones. · Only One Finished Side After painting, cabinet doors are often coated with a pronounced finish to maintain the wood’s longevity. In other cases, homeowners can select a new finish to give their property a revitalized look. Unfortunately, if the finish is just on one side of the cabinet doors, or if the finish is different on both sides, the cabinet doors may alter. · A Missing Latch If the latch is a few centimeters in error, the door may not catch when you open or close it. If so, resist forcing the door tight since it may become stuck to the door frame. · An Incorrect or Incomplete Seal If the latch is a few centimeters wrong, the door may not catch when you open or close it. If so, resist forcing the door close since it may become stuck to the door frame. How to Stop Warping of Cabinet Doors: Conclusion: A warped cabinet door is not such a big problem if addressed correctly. It can be repaired. Remember to examine the damage, do it yourself first, and seek expert help.  At Building Supply Depo, we understand the importance of durable cabinets. Buy cabinets from Building Supply to resist external variables, giving you peace of mind and long-lasting quality. For all your cabinet essentials and more, charge Building Supply Depo to deliver top-notch solutions that stand the test of time.

How To Extend Cabinets To Ceiling ?
Extending Cabinets

The Beauty Of Extending Cabinets For a Spacious Kitchen

Do you want a kitchen renovation that combines elegance and space? It’s time to embrace a transformative strategy – extending your cabinets to the ceiling. Beyond mere storage expansion, this work is a visual masterpiece. The addition gives the impression of higher ceilings by drawing the eye upward, which opens up and refines the room. Come along as we explore the technique of seamlessly extending cabinets to the ceiling to maximize functionality while enhancing the aesthetic appeal of your kitchen. Choosing The Right Cabinets For a Successful Extension Project: Choosing the appropriate cabinets is the first and foremost step before starting a cabinet extension project, which requires careful planning. Check out various cabinet sizes and types before getting too caught up in the specifics of the expansion procedure. Seek solutions with classic styling and sturdy build quality to make sure they blend in with the style of your kitchen as it is now. This essential decision is the foundation for a successful extension project, impacting both use and aesthetic appeal. Key Measurements and Meticulous Design For Flawless Extension: Accurate measurements are crucial for a seamless extension. Measure the existing cabinets and the space to the ceiling, considering any architectural features. Plan the extension meticulously, factoring in design elements and potential challenges. Foundation Of Transformation: Cabinets should be made empty frames for the extension by removing their doors and attachments. Create extensions with high-quality materials, like MDF or plywood, to ensure seamless integration with the current cabinets. Make a sturdy base for a uniform and well-kept kitchen by assembling and fastening extensions with wood glue and screws. Careful Installation For a Perfectly Aligned Kitchen: Carefully install cabinet extensions to guarantee flawless integration with the current units. When installing, use a level to ensure alignment, and use extra screws to strengthen connections for stability. This process ensures that your raised cabinets reach the ceiling and blend perfectly with the original layout. Also read : Warped Cabinet Doors: Prevention and Repair Strategies for Enduring Cabinets: Crown Molding and Custom Touches for a Polished Kitchen: Finish off your cabinet extension project by adding crown molding for a finished look. To create a unified appearance that goes well with the overall design of your kitchen, think about painting or refinishing your cabinets. Seize the chance to add your touch with ornamental accents or upgraded hardware. Embracing Elevated Spaces with Building Supply Depo: As you wrap up your exploration of extending cabinets to the ceiling, picture the metamorphosis of your kitchen—a space elevated, both in terms of spaciousness and refinement. Explore the varied cabinet selections available at Building Supply Depo. Within its confines, you’ll encounter a haven of options to buy cabinets that not only cater to your practical requirements but also enhance the visual appeal of your kitchen. Embrace the metamorphosis, allowing your kitchen to mirror your style authentically.